
In Snowflake, a schema is a logical container or namespace that holds database objects such as tables, views, and functions. Schemas help organize and manage these objects within a database. Schemas are also used to control access to objects by granting privileges at the schema level.
Understanding the Default Schema in Snowflake
Creating a Schema in Snowflake
Understanding the Default Schema in Snowflake
Every time you create a database, Snowflake will automatically create two schemas for you: the INFORMATION_SCHEMA and the PUBLIC schema.
INFORMATION_SCHEMA:
The INFORMATION_SCHEMA is a system schema provided by Snowflake that contains a collection of views of your Snowflake account and databases, and cannot be deleted (dropped), renamed, or moved.
PUBLIC SCHEMA:
The PUBLIC schema is initially created empty, allowing you to populate it with tables, views, and other objects over time. The PUBLIC schema can be dropped, renamed, or moved at any time.

Creating a Schema in Snowflake
Using the web UI:
Step-1: Log in to your Snowflake account with appropriate privileges.
Step-2: Under the Data tab, select Databases, choose your database, and then click on +Schema. Refer to the image above for your reference.
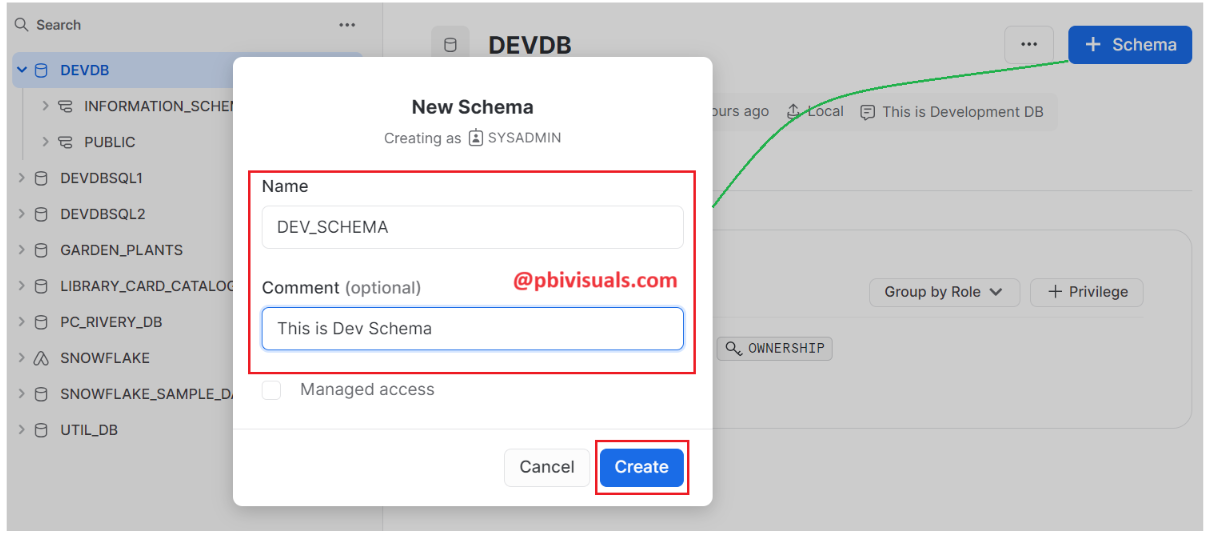
Step-3: After that, a pop-up window will appear. Provide the schema name and comment, then click on Create.
Step-3: Schema created successfully.

Using SQL Command:
Step-1: Add a new SQL Worksheet.
Step-2: To select the database under which you want to create a schema, write the SQL query below and execute it.
Here, DEVDB is Database name.
USE DATABASE DEVDB;
Step-3: Write the SQL statements below and execute them one by one. See the two different ways to create a database in Snowflake
To create a schema, use the CREATE SCHEMA command and provide the desired name for the new schema.
CREATE SCHEMA DEV_SCHEMA1;

CREATE OR REPLACE SCHEMA DEV_SCHEMA2;
Step-4: This command will display a list of all the schemas in your Snowflake account.
SHOW SCHEMAS;

Step-5: Another way to verify the Schema Creation: To ensure the schema was created successfully, you can query the INFORMATION_SCHEMA to list the schemas in your database. For example:
SELECT schema_name
FROM INFORMATION_SCHEMA.SCHEMATA;
Drop Schema
To drop (delete) a schema, you can use the DROP SCHEMA command.
DROP SCHEMA DEVDB.DEV_SCHEMA1;
It will permanently delete the schema and all its objects (tables, views, etc.) within it.
Thank you for reading this post, and I hope you enjoyed it!
![]()