How to build your first canvas App? In this blog you will understand “how to create first canvas app?”
Following these steps-
Step-1: Login into Power Apps maker Portal with your work or school mail id- https://make.powerapps.com/
Note: Power Apps doesn’t not support personal mail id, you have to sign in with you official mail id or Id assigned by your school.
Step-2: Now click on Create tab > choose Blank app > Click on Create

Step-3: Give app name and choose the App format > Click on Create button.

Step-3: Now you can see the blank canvas power apps screen.

Add Datasource in canvas app
Connect canvas apps with data source, in this example you will see how to connect canvas app with Excel data source.
Make sure you have upload a excel file online, You can store the Excel file in a cloud-storage account, such as Dropbox, Google Drive, OneDrive, and OneDrive for Business.

Format your data as a table in excel and give proper table name, Open excel file > Inside Home tab> go to Format As Table > and choose any format style. See the given below screenshot-


Now in Canvas App go to Data tab> click on +Add Data > Search OneDrive for(Business) connector > Click on OneDrive for Business.

After that choose your Excel file, then Select table and click on Connect button.

Display Data in Gallery
Go to the Insert tab > Choose Vertical Gallery
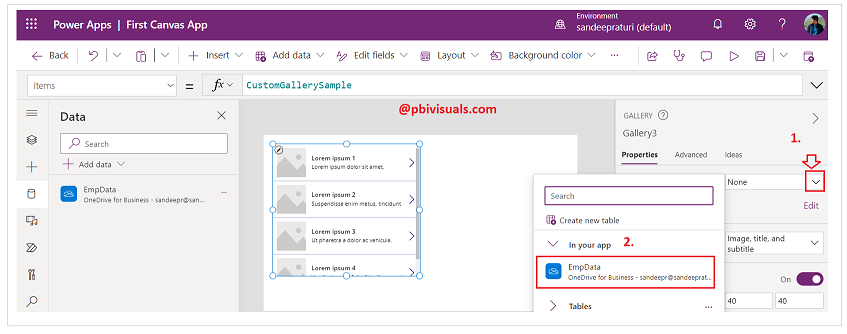
Now you can see the data in Gallery, also you can change the layout as per your need.
Click on Layout dropdown and choose the layout.

Refer more Power Apps post- Microsoft Power Apps
Hope you enjoyed the post. Your valuable feedback, question, or comments about this post are always welcome.
![]()