In this blog you will understand “How to connect SQL Server to Power Apps?” or How to load data from SQL server to canvas app?.
Following these steps-
Step-1: Login into Power Apps maker Portal with your work or school mail id- https://make.powerapps.com/
Note: Power Apps doesn’t not support personal mail id, you have to sign in with you official mail id or Id assigned by your school.
Step-2: Now click on Create tab > choose Blank app > Click on Create

Step-3: Give app name and choose the App format > Click on Create button.

Step-3: Now you can see the blank canvas power apps screen.

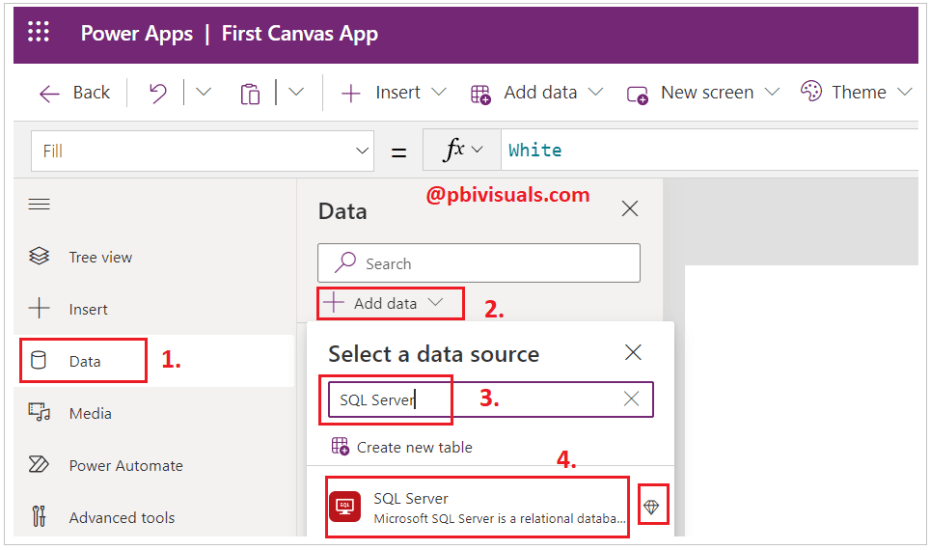
Connect SQL Server to Power Apps
Note:- If you are using SQL data source in a Power App then every user will require a Premium license, either a per user or per app license. See the license plan Pricing – Power Apps (microsoft.com).
Now go to the Data tab> click on +Add Data > Search SQL Server connector > Click on SQL Server.
If you already have a connection to the database that you want to use, click or tap it else click on +Add New connection.
You can see the Diamond icon next to the SQL server name that means this connector require license.

After that select the Authentication Type, and choose any option –
Connect directly(Cloud services)– Enter SQL server name, database name, user name, and the password for the database that you want to use.
Connect using on-premises data gateway- Enter SQL server name, database name, user name, and the password for the database that you want to use, and specify the gateway.
If you don’t have a gateway, install one, and then click or tap Refresh gateway list.

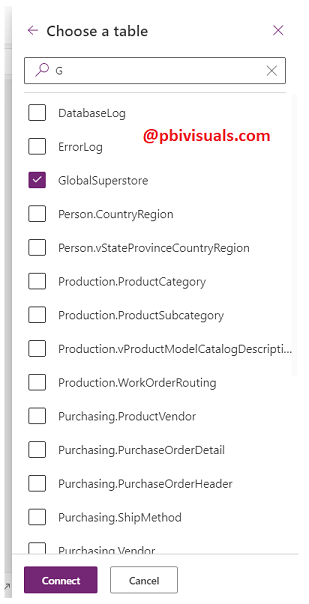
After that click on connect button and choose the tables which you want to add.
Refer more Power Apps post- Microsoft Power Apps
Hope you enjoyed the post. Your valuable feedback, question, or comments about this post are always welcome.
![]()