In this blog you will understand all types of variables in Power Apps. Mainly, there are three types of variables in Power Apps, and they are-
1- Global variables are similar to a global variable in a programming language. It can hold any value, text string, number, Boolean, record, table etc.
The scope of a global variable is the entire app, you can access a global variable anywhere in the app.
Syntax-
You can create a Global variables by using Set function-
Set( VariableName, Value )
- VariableName – Required. The name of a global variable to create or update.
- Value – Required. The value to assign to the context variable.
Example-
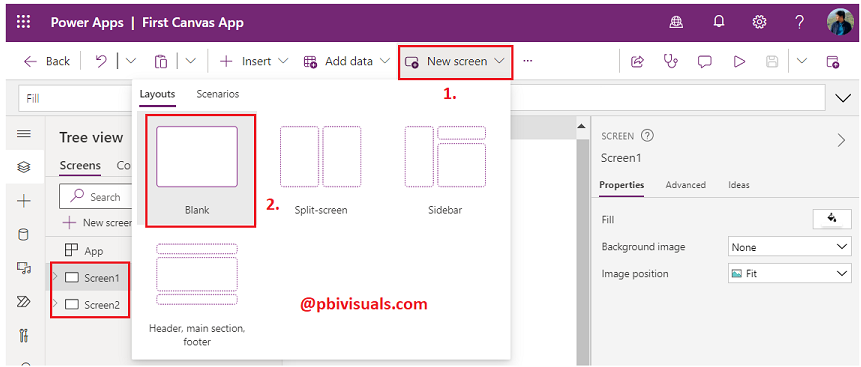
Step-1: Add two screen in canvas app – Go to New screen tab > choose Blank screen
Step-2: Now in screen1, Add one Text Input & Button, Go to + Insert Tab > Click on Text Input and then Button.

Step-3: Select the button and go to the OnSelect Property of button and create Global variable
Set(varGlobal, txtEmail.Text)

Step-4: Run the App, and enter any mail id and click on Button> close the screen.


Step-5: View the variables in Power Apps studio.
In App menu click on three dot icon and select Variables.

See the Global variables with store data.

Step-6: Access global variable in another screen-
Go to the Screen1 button OnSelect Property and changes in code
Set(varGlobal, txtEmail.Text); Navigate(Screen2);
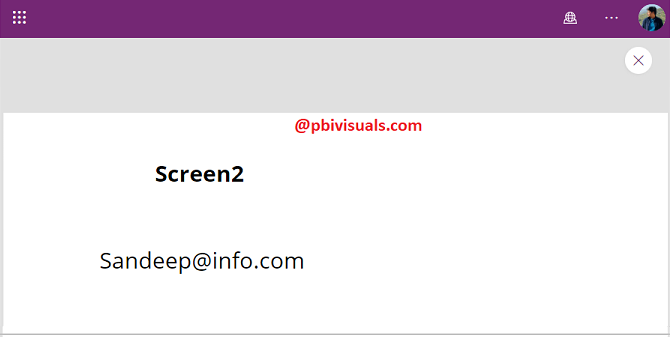
Step-7: Add one Text Label in Screen2. And change the label Text property- varGlobal
Step-8: Now run the screen1 and enter mail id and click on button, it will navigate you to screen2 and display the mail id entered by you in screen1.
2- Context variables (Local Variables) are similar to the parameters we send to methods in programming languages. Useful for passing values to a screen and the scope of a context variables is a single screen.
Syntax-
You can create a Context variables by using UpdateContext function-
UpdateContext({contextvariable: "Value"})
- ContextVariable – Required. The name of a context variable to create or update.
- Value – Required. The value to assign to the context variable.
Example-
Step-1: Add the following controls in canvas app screen.
- Two Input Text box for Name & Email
- one Button
- Two Text label for display the value of variable
And write the below code in button OnSelect property.
UpdateContext(
{
contextvariable_Name: txtName.Text,
contextvariable_Email: txtEmail.Text
}
)

Step-2: Now change the Text property for both label contextvariable_Name & contextvariable_Email
After that run the app and enter the name & email id and see the output.

Step-3: View the UpdateContext variables in Power App studio-
Go to App header menu> click on three dot icon and choose Variables

Step-4: Access UpdateContext variables into another screen-
When you will try to access the UpdateContext variable in another screen then you will see the below error.
Because the scope of this variable is single screen only, and this variable is created in screen1.

3- Collections holds a table that can be referenced from anywhere in the app.
Allows the contents of the table to be modified rather than being set as a whole. Can be saved to the local device for later use.
Types of collections-
Collect – The Collect function adds records to a data source, and the items to be added can be – A single value, Record & Table.
Syntax-
Collect( DataSource, Item, … )
- DataSource – Required. The data source that you want to add data to. If it doesn’t already exist, a new collection is created.
- Item(s) – Required. One or more records or tables to add to the data source.
Example-
Step-1: Add two Text Input box and one button and write the below code in button OnSelect property.
Collect(VarCollect,{Name:txtName_1.Text,Email:txtEmail_1.Text})

Step-2: Add Gallery control in Screen, and go to +Insert tab> Choose Vertical gallery.
Now select Gallery and change the Items property

Step-3: Run the app and you can add single or multiple record here.

Step-5: Also you can access the collect variable anywhere in the app.
Add Gallery control in another screen and change the items property of Gallery VarCollect.

ClearCollect –
The ClearCollect function deletes all the records from a collection. And then adds a different set of records to the same collection.
With a single function, ClearCollect offers the combination of Clear and then Collect.
Syntax-
ClearCollect( Collection, Item, … )
- Collection – Required. The collection that you want to clear and then add data to.
- Item(s) – Required. One or more records or tables to add to the data source.
Example-
Step-1: Add two button and two Gallery in canvas app screen.
Step-2: Write code in button OnSelect property
For Button1-
ClearCollect(varClearCollect,
{Id:1, Name:”Sandeep”},
{Id:2, Name:”John”}
)
For Button2-
Collect(varCollect,
{Id:1, Name:”Sandeep”},
{Id:2, Name:”John”}
)

Step-3: Change Gallery Items property
Gallery1 Items – varClearCollect, Gallery2 Items – varCollect
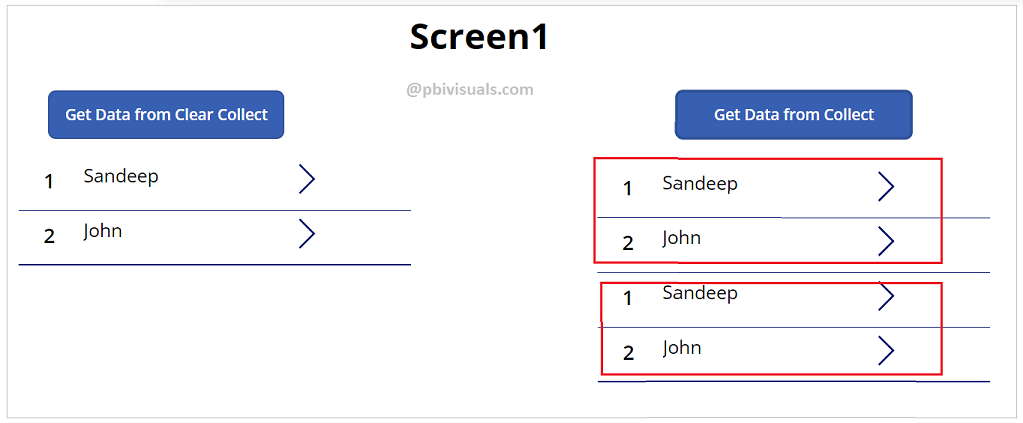
Step-4: Run the App and click on both buttons.

Step-5: Now again click on one more time in both buttons.
So you can see the given below screen shot ClearCollect function deletes all the records from a collection. And then adds a different set of records to the same collection.
And Collect function append rows to a collection.
Clear –
The Clear function deletes all the records of a collection.
Syntax-
Clear( Collection )
- Collection – Required. The collection that you want to clear.

Refer more Power Apps post- Microsoft Power Apps
Hope you enjoyed the post. Your valuable feedback, question, or comments about this post are always welcome.
![]()